DIY Chalk Paint Table

Before and After

table

Before I get into the details of refinishing our table I have to give you guys a quick update.

[Acquiring the table and chairs]

Wow. So a lot has happened over the last couple of months. We are now proud new HOMEOWNERS. The hubs and I have learned SO MUCH through this whole house buying process, and we’re still learning. I guess you never stop. ;)After we moved into our new house I immediately started thinking about decorating ideas. We also started keeping our eyes out for cheap furniture at garage sales and on Craig’s List. We really wanted a new table to fill our house with, and thankfully one of my dear friends wanted to get rid of her old table. She gave us this really nice dining room table with 3 matching wood chairs. My parents also came to help us move and “donated” 4 wooden chairs to our cause. ha. Thank you parentals!! :)

[Design theme?]

Next, I had to decide what color(s)/theme(s) I wanted to go with in our breakfast area. It was actually harder than it sounds because I’m not very good at narrowing choices down. Our kitchen already has a lot of bright green accessories so I decided to tie the green into the breakfast area as well. The theme was a lot easier for me to pick because we already had a mix matched table set, and I really like the country/shabby chic look. So that’s what I picked!

[Learning the ways of chalk paint]

My wonderful sister-in-law agreed to come over to our house one day and teach me how to use chalk paint. We drove to Old Town Spring, TX. (which is adorable by the way). There we found a boutique called Michella Marie & Co. where I was able to make my first chalk paint purchase. I looked at it as an investment because it’s kind of pricey.

[Painting the table]

I ended up buying 1 can each of Annnie Sloan Antibes (green), Coco (tan), and some dark and clear wax.Painting the table was so much easier than I thought it would be! It took about 1.5 days. I just painted right over the old table (no sanding or prepping required). I used about 2 coats of the color everywhere. So 2 coats of green on the legs and 2 coats of coco on the top. Then we just “distressed” the table by applying dark wax everywhere. I learned quickly that it is more of an art than a specific way of doing it.

Anyway, we were really happy with the way it turned out! Let me know what you think! Also, stay tuned for pictures of the chairs and a HOME TOUR. :)

Thanks for stopping by!

C


Our Compassion Story

http://my.compassionsunday.com/cmunster

Please click the link above to read our story of how we decided to sponsor a beautiful girl by the name of Alondra. I wanted to share this with as many people as possible because I love the ministry of Compassion International. It is just such a neat concept. Through Compassion, we’re able to touch the life of a girl that we probably would’ve never met. It is my hope and prayer that should you choose to sponsor a child too, you’ll receive the same amount of joy that it has brought us.

Thanks for reading!

[C]

DIY Dog Bed

Image

It all started when our 50 pound puppy decided that the couch was his bed. He has a kennel that he sleeps in at night and whenever we leave, but he would prefer to be with us when we are home. So the couch is an obvious choice, right? My husband and I decided that we were gonna enforce our new rule of “Rogan is not allowed on the couch.” Our discipline went something like this. . .

a9f3d6af6aca414b3591c050e3edbe15

Which brings me to why I decided to get Rogan a bed of his own. At first we were just going to buy one, but after looking at different stores we realized that they weren’t made very nice. Most of them had this gross stuff that looked like hair (instead of real stuffing inside of them), and they weren’t the most washer/dryer friendly.

I looked for ideas on Pinterest, and I decided to pull out my sewing machine and make him one. I modeled my version after a tutorial found here. Originally, I was going to make one identical to the picture below because it’s so cute and pretty. But after looking at the fleece selection at Hobby Lobby, I decided that none of their prints would give the same effect, and I wanted a color that matched Rogan’s hair. (it’ll look less gross after he sheds his hair on it)

1889564b6af96f3059ca20e790afabb0

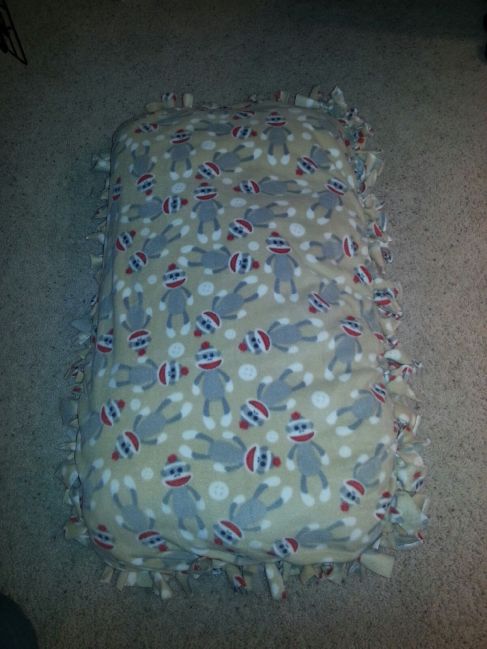
I found the material at Hobby Lobby. I bought a yard of clearanced red fabric to go inside of the fleece cover and a yard and a 1/2 of the sock monkey fleece. Next, I made a pillow out of the red fabric by sewing it together with my machine.

Image

[I will be doing a pillow tutorial later on if you don’t know how to make one, but you can also find tons of tutorials online as well.] I stuffed the pillow with stuffing that I already had and sewed it up all of the way.

Most importantly, I scotch guarded the pillow. (the hubs idea :)) Now it doesn’t matter if the pillow gets wet. It should be water resistant.

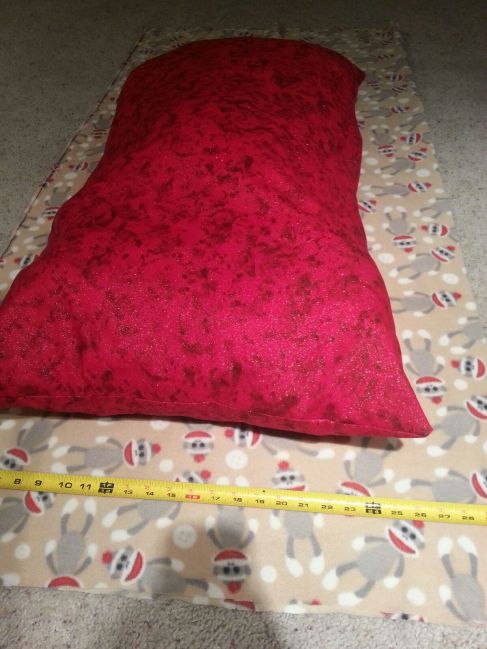
Next up was measuring and cutting the fleece.

Image

I left about 6 inches of fleece all the way around the pillow. I cut 4 inch long by 1 and 1/2 inch wide slits all along the fleece. Then, I tied the fleece together by double knotting each tab of fabric around the pillow.

I also bought a zipper for the fleece, just in case I decide to sew it up (instead of the knots). I may get tired of unknotting/knotting it every time I want to wash it.

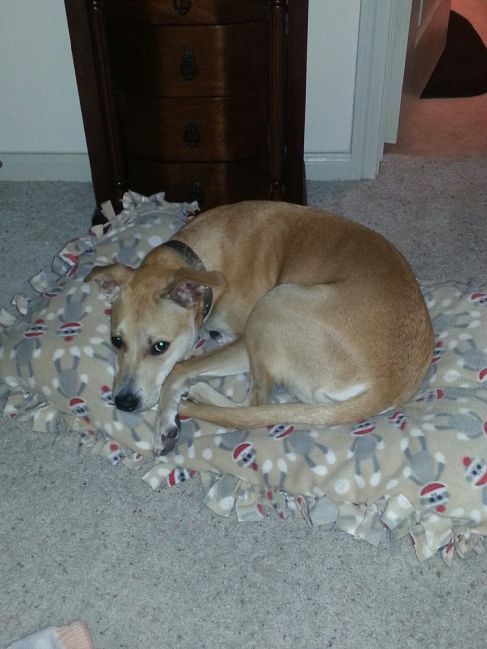
I really like the way it turned out and so does Rogan! It’s always way cooler knowing you’ve made something. :)

Image

Easy Peasy Craft

Image


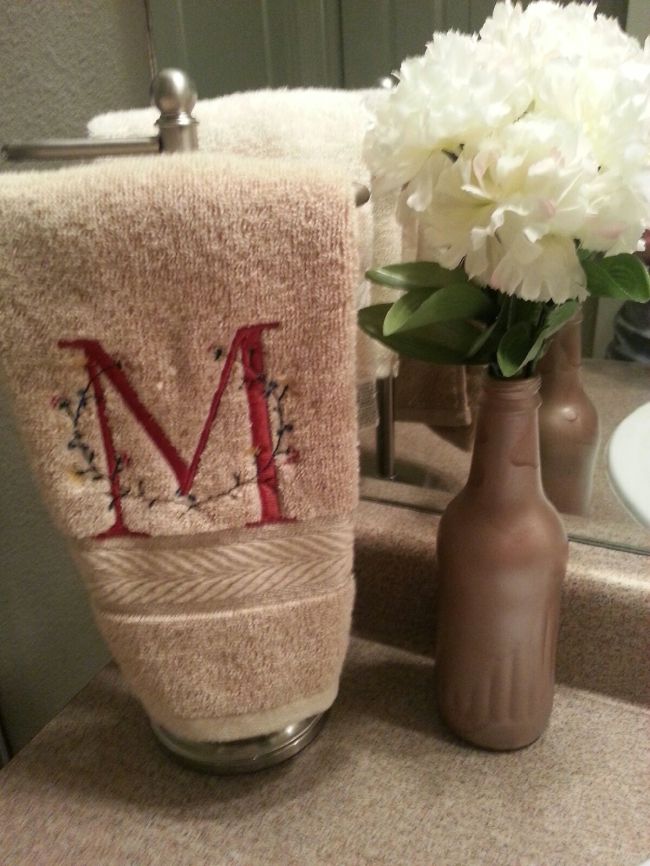
Nope. The towel isn’t the craft. My mom made that for me. Sorry. :) But isn’t it lovely?

The craft is the bottle turned into a flower vase. It’s nothing spectacular, but it was super easy to do. It didn’t cost anything to make because I already had all of the supplies. And who doesn’t like free decorations? I’ve been needing something to go next to my hand towels in our bathroom, and this works perfectly.

I used an old Crush soda bottle and cleaned the sticky labels off with Goo Gone. That stuff is amazing, by the way. 

Image


Then, I just used some satin brushed metallic gold spray paint and voila! What a lovely FREE vase. 

I’ve been dealing with a sick puppy for the past couple of days. :/ Apparently Rogan has some sort of allergy that’s making him swell up with hives. Thank God for Benadryl. Seriously. I took him to the vet yesterday and hopefully he gets better soon!

Thanks for stopping by! :)

Vindicated.

Image


My husband’s birthday was last week, and his absolute favorite dessert is apple pie. So in an attempt to win the “best wife of the year award” I decided to try one of Paula Deen’s recipes. (found here, apple cinnamon roll cupcakes) I usually do pretty well with baking and cooking, but for some reason this recipe was a complete and total FAILURE. (I think my yeast was expired)

Flash forward a few days: I had planned a big surprise party for him, and invited our friends over to our humble abode for my non-existent tasty creation. So there I was, a few hours before the big surprise depressed, tired of baking, and ready to give up. So I did. I ended up buying HEB cupcakes, which were actually pretty good. I told my husband about my dilemma after the fact, and he completely understood. We were even able to laugh about it.

But something inside of me just wasn’t content with letting the hub’s birthday pass without a special treat. Fortunately, the next day I had a magical idea pop into my head (probably because I kept thinking about the failed recipe over and over agin). I decided to create my own “apple cinnamon roll cupcakes” using only 3 ingredients. (plus a homeade icing recipe)

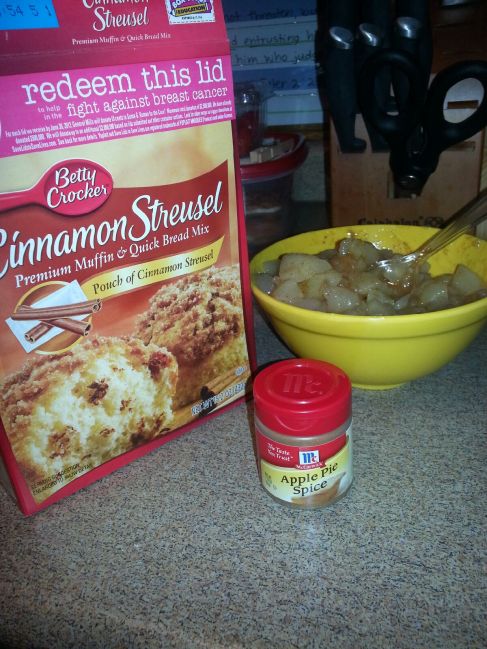
I already had a box of Betty Crocker’s cinnamon streusel muffin mix that I couldn’t wait to try, and I decided to just add a can of Lucky Leaf apples to that. The outcome was so amazingly good!

Image


Image


The hubs LOVED them, and I was vindicated! :) 

Here’s the recipe:

  • Empty one 21 oz. can of Lucky Leaf apples and cut them into bite sized pieces and place them in a bowl
  • Add 1 tsp of apple pie spice to the apples
  • Mix the muffin mix as instructed on the box and add the apple mixture to that
  • Sprinkle the included streusel on top of the muffins in the cupcake pan
  • Bake according to the instructions on the box
  • Let cool and add icing if you wish

Optional Icing

For the icing I just used powdered sugar and milk. I mixed powdered sugar with about 1 Tbs of milk. I kept adding the sugar until the icing was a consistency that I liked.

I’m so glad that I was able to make these for Keith, and I’m even more glad that he liked them. He even shared some with his coworkers the next day, and they loved them too! 

I hope you like it as well! Enjoy! :)

Brown Cowl or Scarf

Image


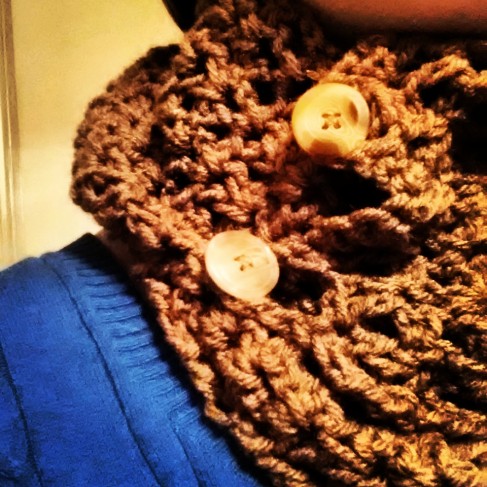
I’m so excited about my newest creation! It’s a cowl/scarf which means it’s basically a TRANSFORMER. ;)

I used the same pattern that I used for my infinity scarf, found here;  so, it only took me a few hours to make. But I changed it up by adding two buttons loops on one end of the scarf and attaching two buttons to the other end. Now I can wear it as a cowl with the pretty buttons on display or as a normal scarf. Too bad the weather is only getting warmer over here.

Keith’s (the husband’s) birthday was this week. Come back for my next post about that! :)

Image

From the Tree Giveaway

Today I ran across a really neat blog called ‘From the Tree.’ She’s a fellow crafter who just so happens to be offering a chance to win one of her specialty e-reader cases. All you have to do is comment and say which case you like best and like her page on facebook. You can find the giveaway here. Hurry and check it out! The contest ends on Sunday. :)

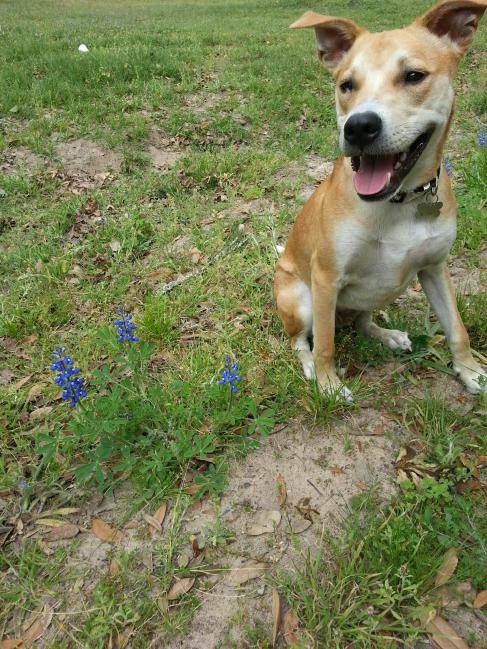
Here are some pictures of Rogan that I took this past weekend. The hubs and I were able to drive out to camp, rock climb, and ride horses. Rogan loved running around in the open fields.

The Bluebonnets have started to bloom (Texas’ state flower), and it’s SO pretty when they cover the fields! I still want to take some pictures with the flowers and Keith one of these days. (when we just so happen to be wearing matchy-matchy clothes) On our way out to camp they had tons of people randomly taking family portraits on the side of the highway in the Bluebonnet fields.

Image

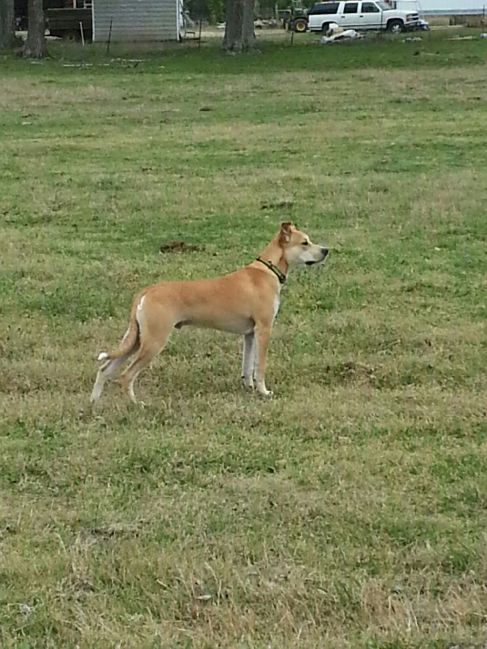
Doesn’t this next picture just scream, “CHAMPIONSHIP DOG POSE?” haha. He’s such a pretty puppy.Image

Thanks for stopping by!

Pants to Shorts Transformation

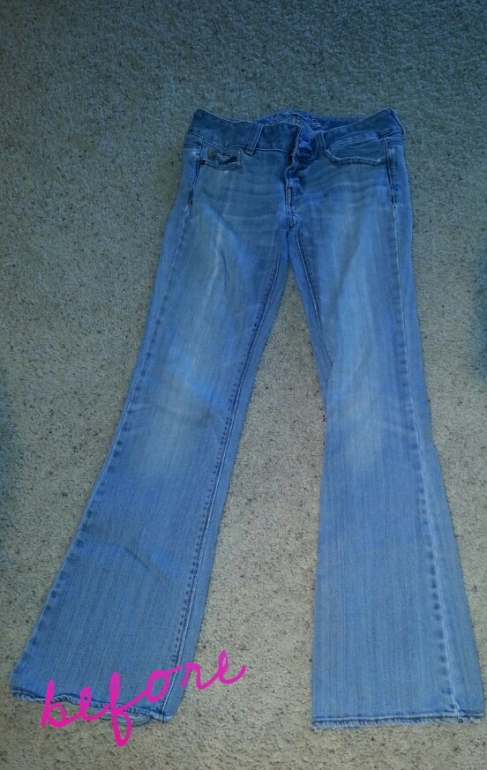
Spring has finally sprung! (at least in Texas it has) I found some cute flowery shorts on Pinterest a while ago, and I decided that I was gonna try to make them myself out of a pair of old jeans. My inspiration can be found here.

I started with this old pair of American Eagle jeans.

Image

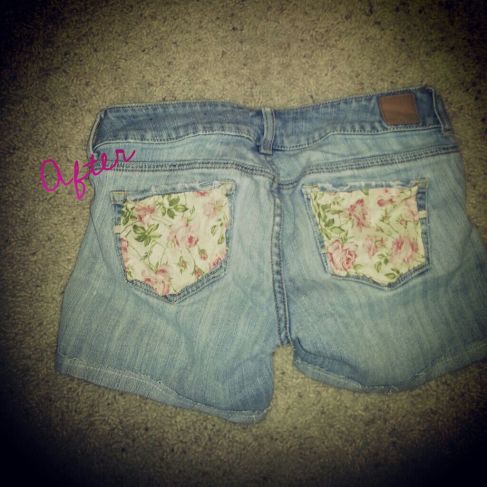
My favorite part about making my own shorts is cutting them to the length that I desire. I hate it when stores only offer two options: super short/unflattering shorts or bermudas. I like shorts that have about a 2-3 inch in seam. Once I figured out the length that I wanted, I hemmed them with a sewing machine.

I found some cute floral fabric at Hobby Lobby, and I attached it by hand to the pockets. Here’s how they turned out.

Image

I’m really happy with the outcome, and I’m excited about having a new springy piece of clothing in my closet.

I hope everyone had a beautiful Easter weekend. My husband and I were able to attend church and spend the afternoon with family. It was a great time of remembering Jesus Christ’s resurrection and victory over death. I LOVE EASTER. :) 

signature1

Fonts are cool.

Image

I ran across this super cool blog the other day, and I thought that I’d share it with you. The blog is called Kevin and Amanda (click here), and they have LOADS of fonts that you can instantly download…for FREE. :)

There’s a button in the right hand column towards the bottom that allows you to download all of the fonts at once. That’s what I did, and now I’m going to get back to creating cool things with them.

Thanks for stopping by!

Image

DIY Wreath

Image

Oh my word. I’M SO EXCITED ABOUT THIS POST.

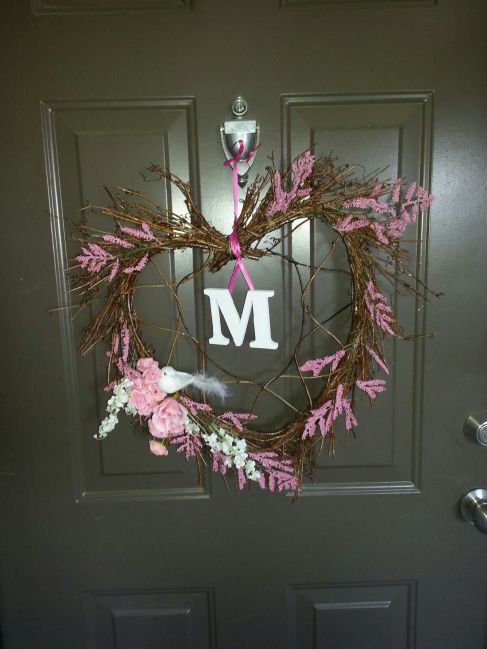
Yesterday, I got to hang out with one of my best friends. We decided before hand that we were going to make something crafty, but we didn’t know what. I got to her house, and she had the idea of making our own spring wreaths. Before I say anymore, I feel like you should know that neither one of us are florists. haha. I was a little hesitant at first. However, once we got to Hobby Lobby and I saw the price of already made wreaths ($100 easily), I was super excited about our endeavor.

We had a little trouble figuring out what kind of supplies to buy and for the best price. We ended up getting:

  • plain heart shaped wreaths for $10 (plus the 40% off coupon)
  • cardboard letters for $1
  • different kinds of flowers all for around $4
  • one package of 3 white birds for $3.99 (we shared this)

So with our super savvy shopping skills we made our custom wreaths for about $15. I’m so excited about how they turned out, and I can’t wait to make more for gifts. My mom and two of my sister-in-laws birthdays are in April.

Image

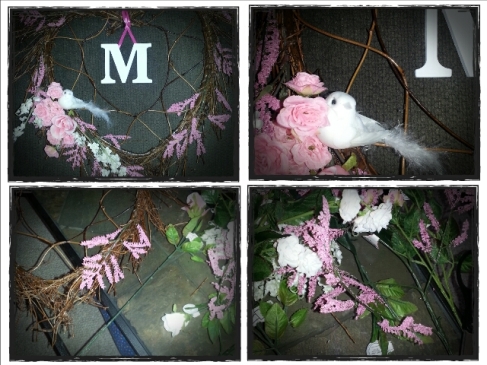
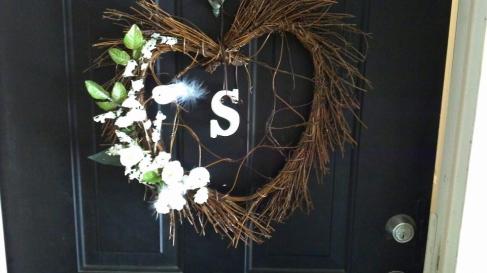
Work in progress. Have I said that I LOVE the way it turned out? I used hot glue to fasten pretty much everything to the wreath. I also weaved some of the flowers into the wreath to make it look more natural.

Image

My friend’s wreath. She wanted something more simple. I love hers, because she can use it in the winter time as well.

Thanks for stopping by! I really do appreciate everyone who finds my blog interesting enough to read.

I should totally start an etsy store. ;)

signature1